DIY glitter nails and stardust design like a pro

DIY glitter nails like a pro saving money!

I had some leftovers from Christmas decorations and I had no glitter nailpolish so what you are gonna do?
Combine the both of them and make some DIY glitter design from home! simple as that!

This is great for many reasons, especially to save money but still looking fashionable! You will not only recycle christmas leftovers but you will have some salon looking nails without actually going to the salon! simple, easy and cheap!


All you need for this DIY is a trasparent nailpolish and some glitters for crafting, I’m sure you have those at home somewhere!

Optional are:

Colored nailpolish, just if you want a base color.
Hair spray (I only used it for the full nail glitter, I didn’t use it for the dark nails decoration, I’ll eexplain why below).

what you need craft diy nails

This was so easy to do and even easier to take off, as the glitter part will just come off in one  piece.

Let’s start:

Red nails with silver glitter (look picture below):

– Put one coat of trasparent nailpolish.
– When it’s still wet dip the whole finger into the glitters (don’t worry about the ones that will be on the skin around the nail, they will go away after simply washing your hands when you’re done).
– Once you have the glitters on it’s better you spray the nail with some hair spray and let it dry (if you don’t have the hair spray just move to the next step).
– if you’re satisfied with the amount of glitters on the finger you can just put one or two coats of transparent nailpolish. This will make the nail smoother and will keep the glitters in place for a LONG time.  (If you want more glitters just use one more coat of trasparent nailpolish, dip again the finger into glitters, let it dry and use one or two coats of trasparent nailpolish to finish it up).
you’re now done! enjoy your new fingers!
oh and wash your hands so the excess of glitters will just go away!

silver glitter diy


If you want this next stardust design here is how!

– put one coat of trasparent nailpolish.
– when it’s still wet, dip only the tip of the finger into the glitters and put another coat of trasparent nailpolish on. Don’t load the brush with nailpolish though! it has to be quite dry to be able to drag the glitters on the nail.
– let it dry and enjoy this new stardust design!

glitter thumb

stardust design

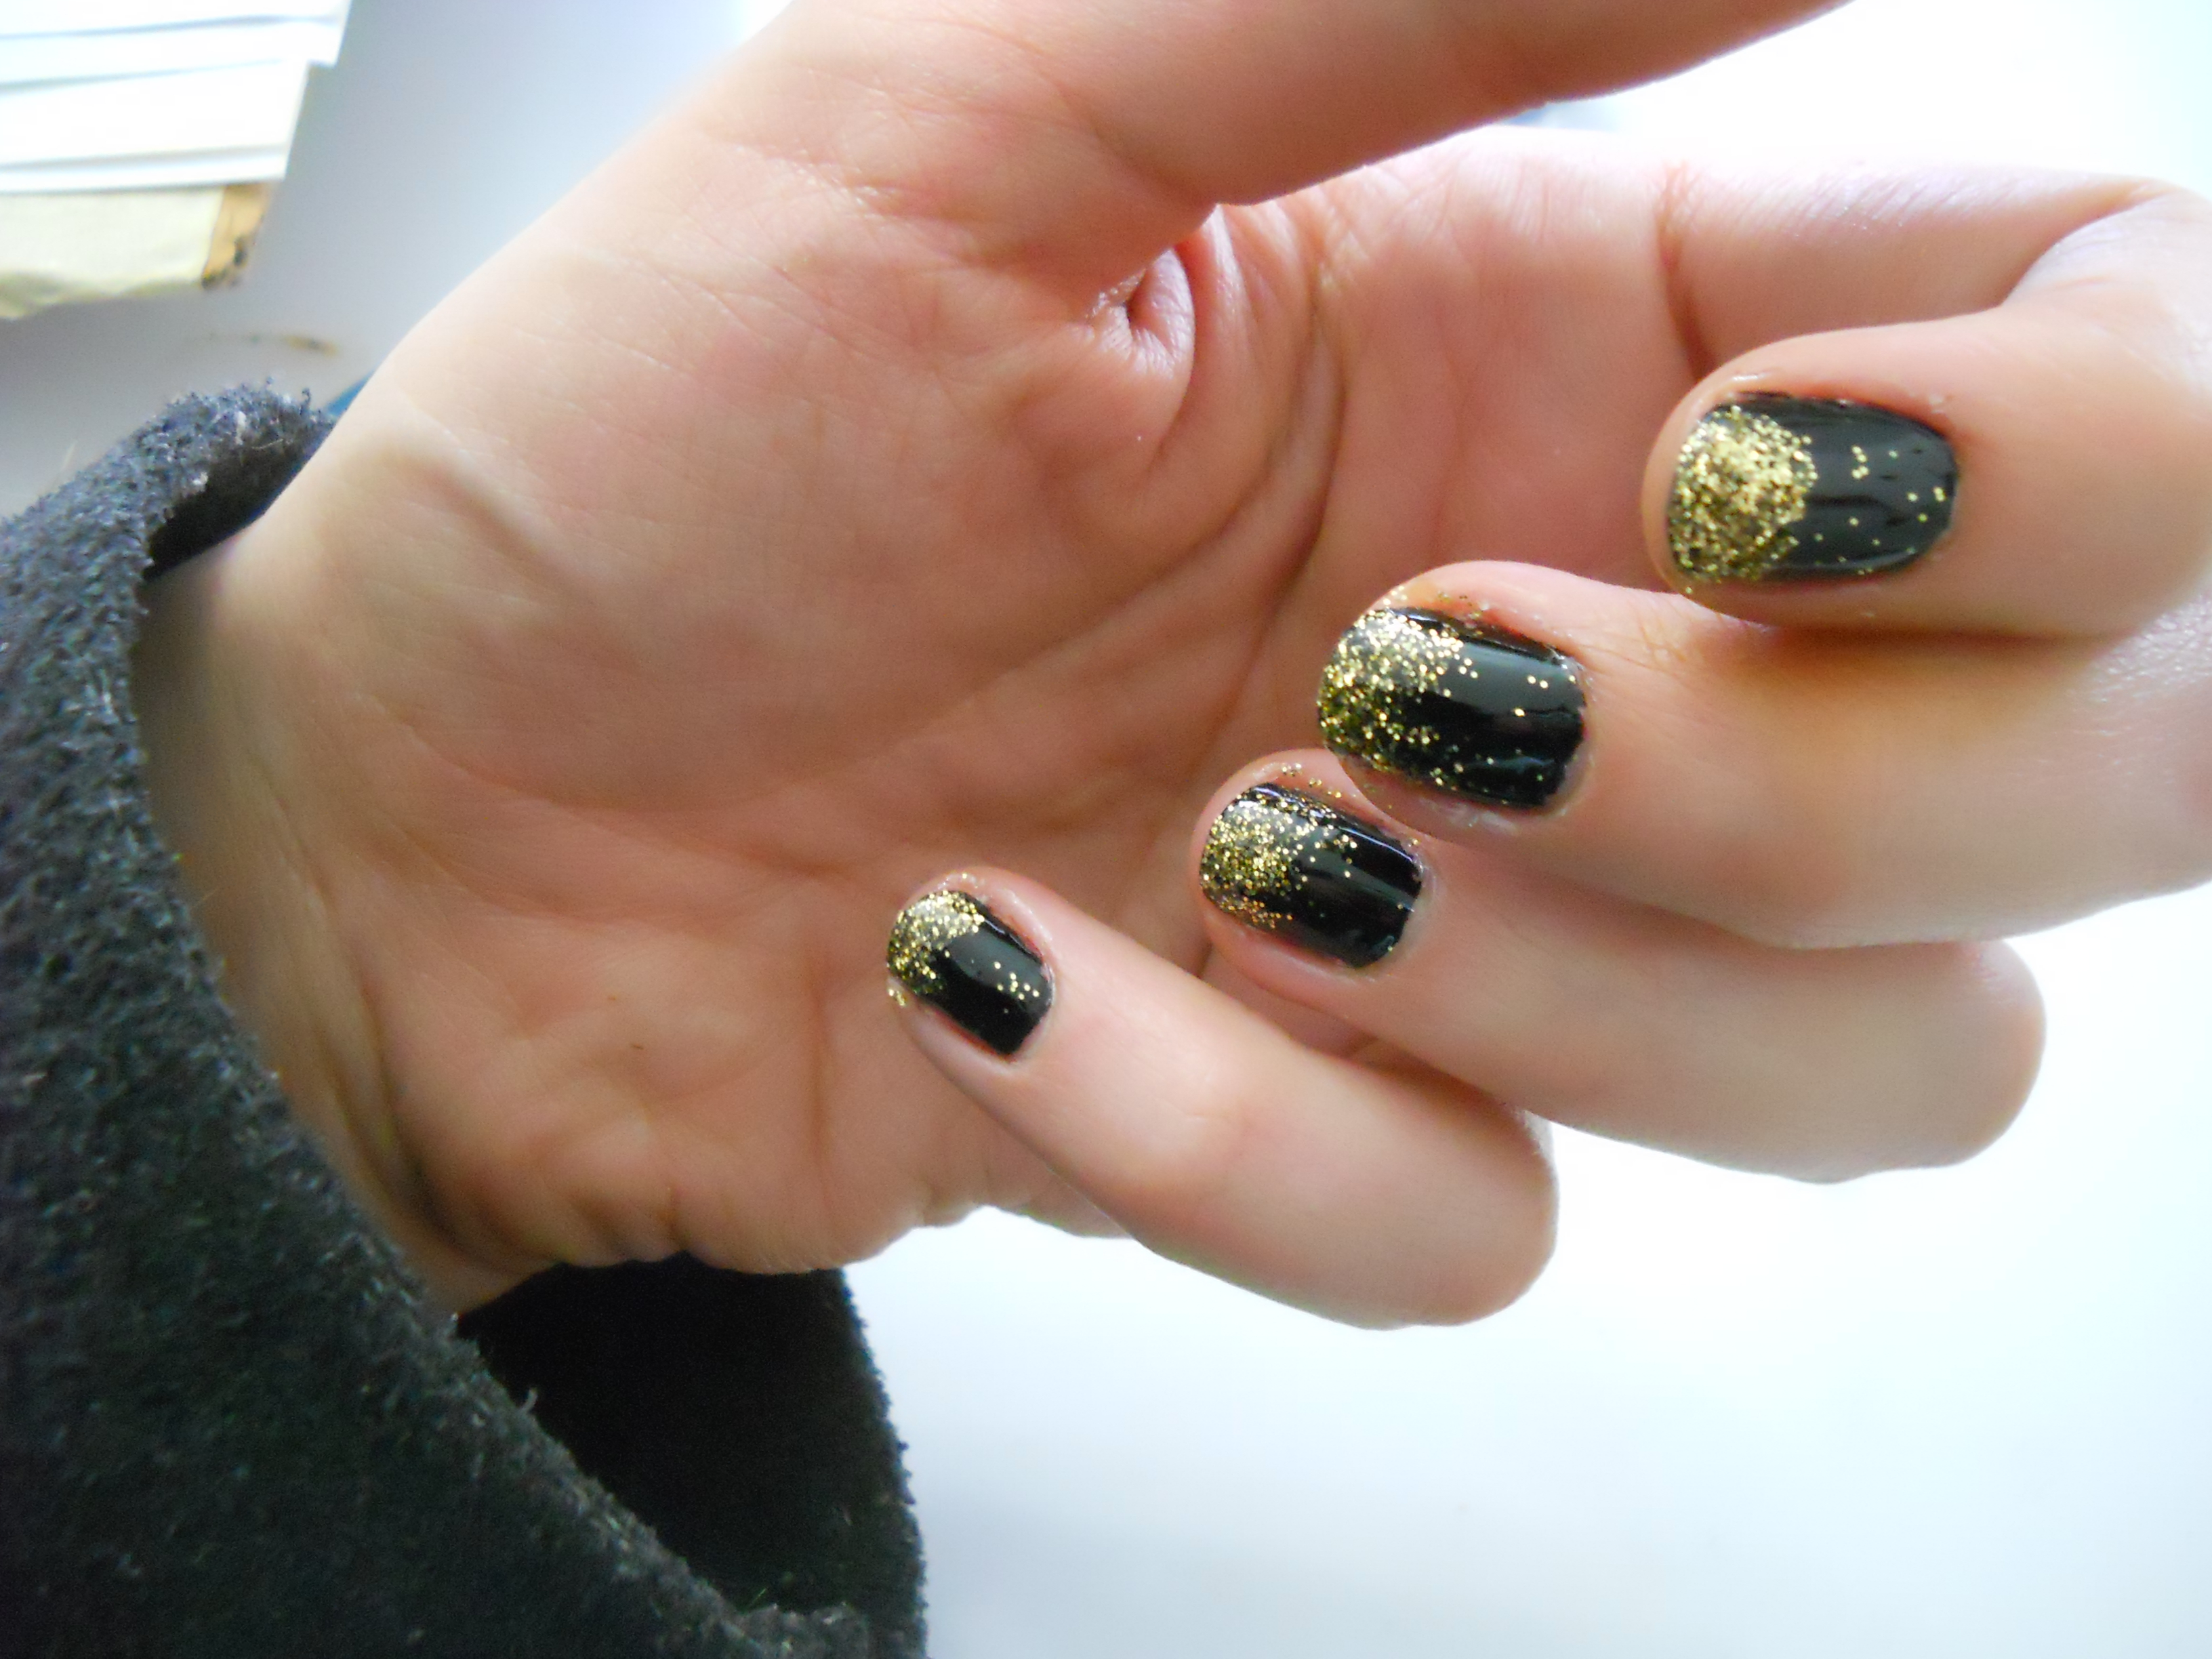
This last one is my fav! but I want to have more fun with it and I’ll try with different base colors, like salmon or pink or who knows!
are you gonna try this hack?
let me know in the comments if you liked this DIY and if you will try it! share it on my twitter so I can see your creations!

-Luna

xoxo

DIY Make your own customizable tool/accessories closet with NO WOOD! Recycled materials

mobile artvlog

This is a very useful tool or accessories chest of drawers and it’s so easy to make!

If you want to storage your materials, makeup, or supplies this is easy, fun, and especially cheap to make!

Organization is the key to everything!

I will show you how to make it step by step with some pictures from the video I’ve made (Here is the full video: https://www.youtube.com/watch?v=RpGwCBhxmXQ )

So let’s start this project! I swear it’s super easy.

The closet measures are:
height: 94,5 cm
length: 59 cm
depth: 14,5 cm


HERE IS WHAT YOU WILL NEED:

Cattura di schermata (3014)


Sticky Paper or Spray Paint


Cattura di schermata (3015)


30 Boxes with a lid

(I feed a few cats’ colonies so I had those boxes but any kind of box that can close is gonna be fine) Cattura di schermata (3013)


Cutter or Scissors if you use the sticky paper


Cattura di schermata (3012)


Hot Glue Gun


Let’s start!

Take the first two boxes and start applying the glue on all the corners. When you get cleser to the lid donìt apply the glue exactly on the corners but a little lower so the lid will open easier (as showed in the pictures)

DSCN4740 DSCN4741

DSCN4743


  1. take the first boxes                             2. apply the glue on the corners                    3. be careful with the ones close                                                                                                                                                               to the lid!


artvlog boxx

DSCN4744


4. put the boxes together                                    5. and you’re done! so easy!


Just keep doing it making 3 lines of 10 boxes each.

Apply the glue between the 3 lines to make it even stronger and paint it as you wish!

If you use the sticky paper it can be tricky to re-open the lids, just feel with your fingers where the openings are (for more clarification please refer to the video https://www.youtube.com/watch?v=RpGwCBhxmXQ ).

Cattura di schermata (3005) Cattura di schermata (3041)

DSCN4745


you need to re-open the lids if you use the sticky paper!


Cattura di schermata (3057)

cassetto artvlog


There you have it!

I added some wood handles (that came from some old canvas I had) just to make it easier to open and also because, being wood, I will write on there what’s in the drawers so I don’t go crazy looking for stuff lol


mobile artvlogI decided to put in it sunglasses, wires for my devices, paint and scarfs and so many more things!


By the way that painting over there is also made by me with fingers on a recycled piece of wood!

If you want to see more of my art here is my portfoliolunaillustrations.blogspot.it

and my youtube channel: Art&Vlog


Hope you like this project! it’s an original idea I had because I thought it was a waste to just throw away those boxes, if you do please let me know in the comments if you’re gonna try it and what for!

Just a few ideas could be to organize: jewelery, toys, craft and art supplies, working tools, accessories, makeup and so on!

I’m actually gonna do another one, maybe smaller, for my hats, belts and scarfs.

Hope you all have a great awesome day!