DIY glitter nails and stardust design like a pro

DIY glitter nails like a pro saving money!

I had some leftovers from Christmas decorations and I had no glitter nailpolish so what you are gonna do?
Combine the both of them and make some DIY glitter design from home! simple as that!

This is great for many reasons, especially to save money but still looking fashionable! You will not only recycle christmas leftovers but you will have some salon looking nails without actually going to the salon! simple, easy and cheap!


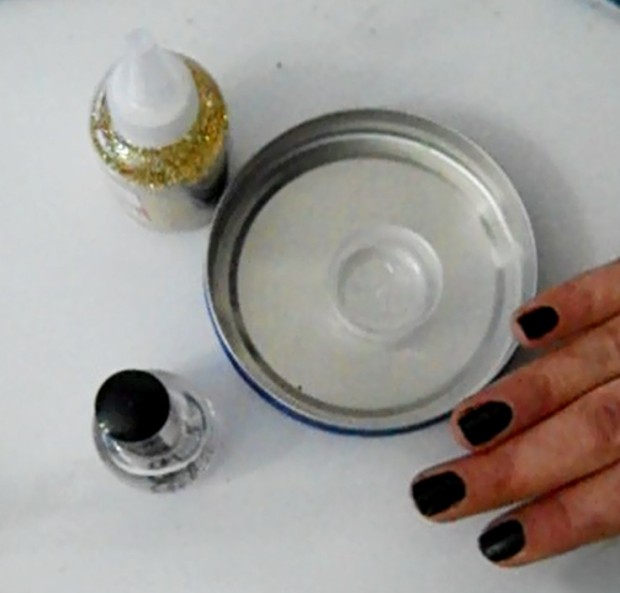
All you need for this DIY is a trasparent nailpolish and some glitters for crafting, I’m sure you have those at home somewhere!

Optional are:

Colored nailpolish, just if you want a base color.
Hair spray (I only used it for the full nail glitter, I didn’t use it for the dark nails decoration, I’ll eexplain why below).

what you need craft diy nails

This was so easy to do and even easier to take off, as the glitter part will just come off in one  piece.

Let’s start:

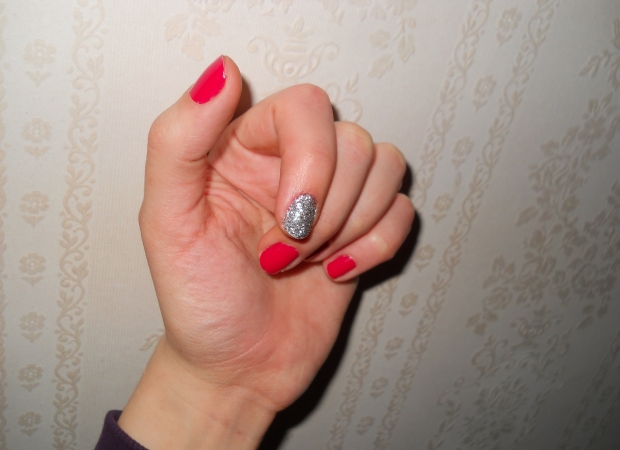
Red nails with silver glitter (look picture below):

– Put one coat of trasparent nailpolish.
– When it’s still wet dip the whole finger into the glitters (don’t worry about the ones that will be on the skin around the nail, they will go away after simply washing your hands when you’re done).
– Once you have the glitters on it’s better you spray the nail with some hair spray and let it dry (if you don’t have the hair spray just move to the next step).
– if you’re satisfied with the amount of glitters on the finger you can just put one or two coats of transparent nailpolish. This will make the nail smoother and will keep the glitters in place for a LONG time.  (If you want more glitters just use one more coat of trasparent nailpolish, dip again the finger into glitters, let it dry and use one or two coats of trasparent nailpolish to finish it up).
you’re now done! enjoy your new fingers!
oh and wash your hands so the excess of glitters will just go away!

silver glitter diy


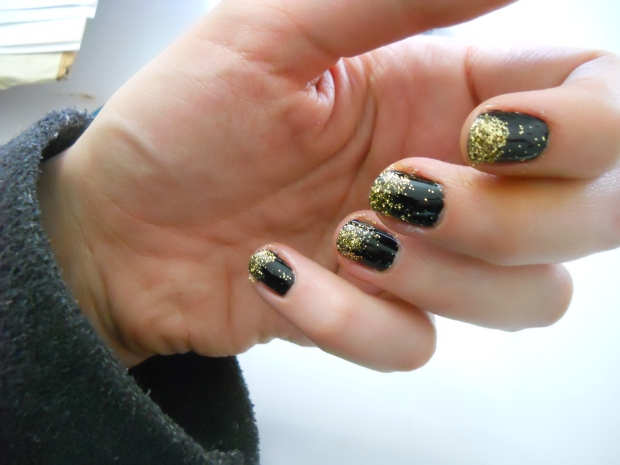
If you want this next stardust design here is how!

– put one coat of trasparent nailpolish.
– when it’s still wet, dip only the tip of the finger into the glitters and put another coat of trasparent nailpolish on. Don’t load the brush with nailpolish though! it has to be quite dry to be able to drag the glitters on the nail.
– let it dry and enjoy this new stardust design!

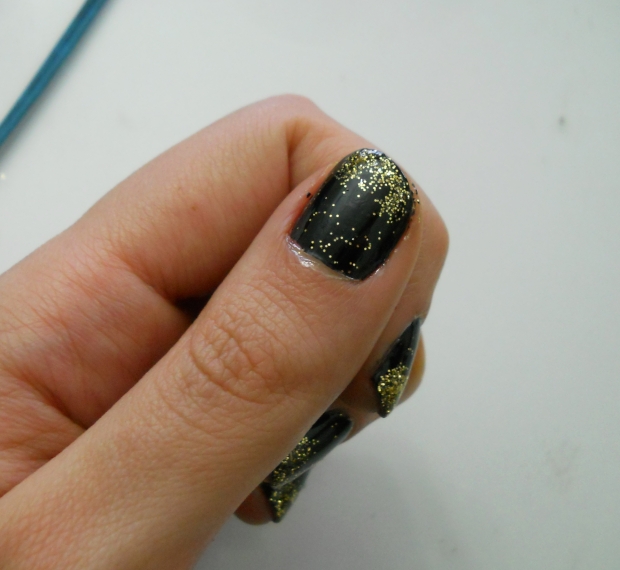
glitter thumb

stardust design

This last one is my fav! but I want to have more fun with it and I’ll try with different base colors, like salmon or pink or who knows!
are you gonna try this hack?
let me know in the comments if you liked this DIY and if you will try it! share it on my twitter so I can see your creations!

-Luna

xoxo

DIY Make your own customizable tool/accessories closet with NO WOOD! Recycled materials

mobile artvlog

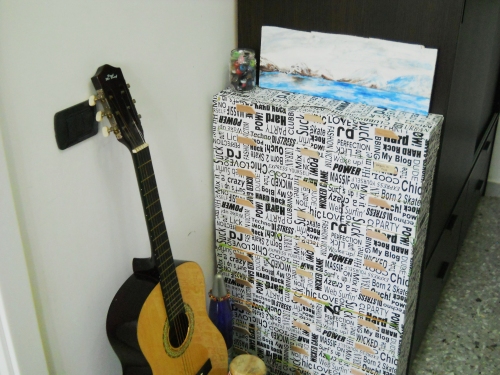
This is a very useful tool or accessories chest of drawers and it’s so easy to make!
If you want to storage your materials, makeup, or supplies this is easy, fun, and especially cheap to make!

Organization is the key to everything!

I will show you how to make it step by step with some pictures from the video I’ve made (Here is the full video: https://www.youtube.com/watch?v=RpGwCBhxmXQ )

So let’s start this project! I swear it’s super easy.

The closet measures are:
height: 94,5 cm
length: 59 cm
depth: 14,5 cm


HERE IS WHAT YOU WILL NEED:

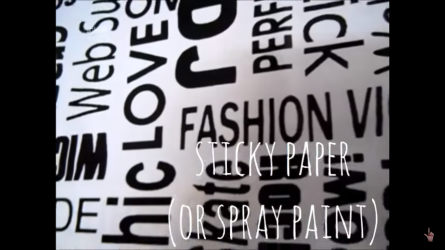
Cattura di schermata (3014)


Sticky Paper or Spray Paint


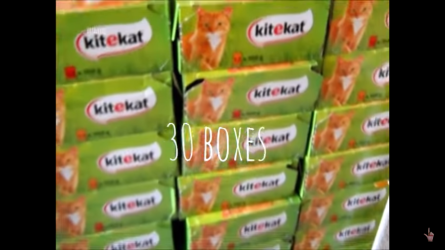
Cattura di schermata (3015)


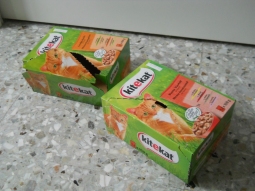
30 Boxes with a lid

(I feed a few cats’ colonies so I had those boxes but any kind of box that can close is gonna be fine) Cattura di schermata (3013)


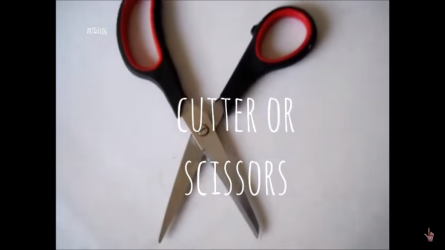
Cutter or Scissors if you use the sticky paper


Cattura di schermata (3012)


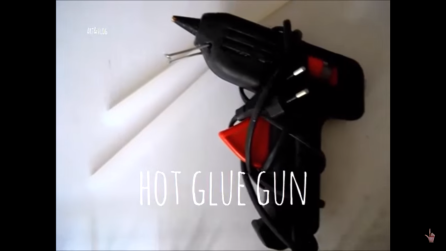
Hot Glue Gun


Let’s start!

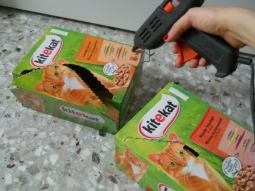
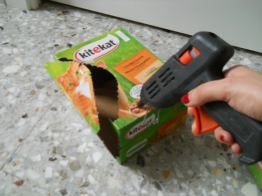
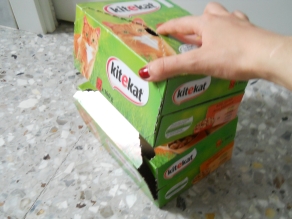
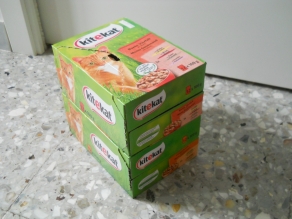
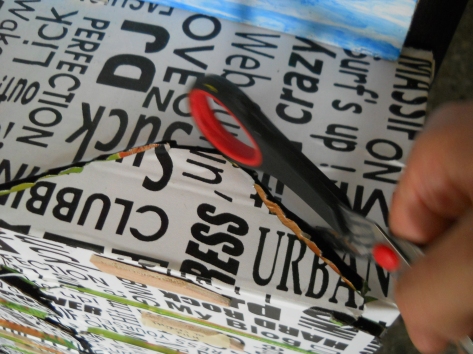
Take the first two boxes and start applying the glue on all the corners. When you get cleser to the lid donìt apply the glue exactly on the corners but a little lower so the lid will open easier (as showed in the pictures)

DSCN4740 DSCN4741

DSCN4743


  1. take the first boxes                             2. apply the glue on the corners                    3. be careful with the ones close                                                                                                                                                               to the lid!


artvlog boxx

DSCN4744


4. put the boxes together                                    5. and you’re done! so easy!


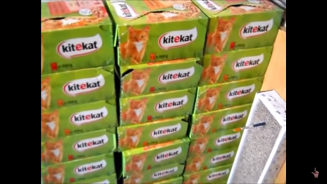
Just keep doing it making 3 lines of 10 boxes each.

Apply the glue between the 3 lines to make it even stronger and paint it as you wish!

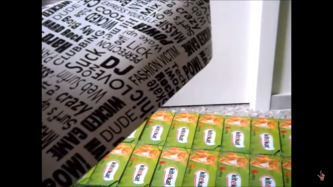
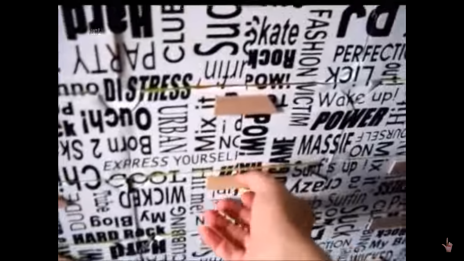
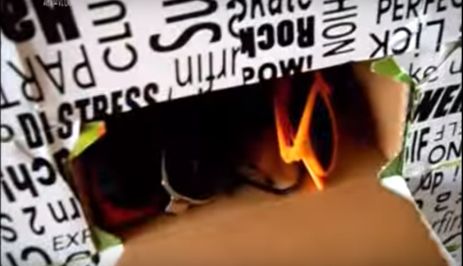
If you use the sticky paper it can be tricky to re-open the lids, just feel with your fingers where the openings are (for more clarification please refer to the video https://www.youtube.com/watch?v=RpGwCBhxmXQ ).

Cattura di schermata (3005) Cattura di schermata (3041)

DSCN4745


you need to re-open the lids if you use the sticky paper!


Cattura di schermata (3057)

cassetto artvlog


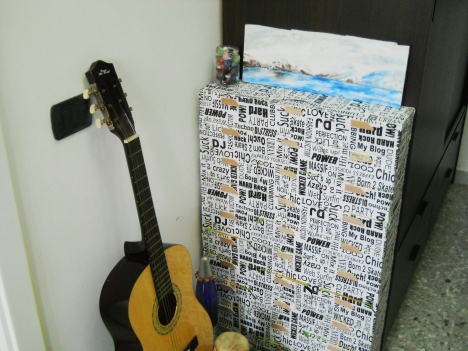
There you have it!

I added some wood handles (that came from some old canvas I had) just to make it easier to open and also because, being wood, I will write on there what’s in the drawers so I don’t go crazy looking for stuff lol


mobile artvlogI decided to put in it sunglasses, wires for my devices, paint and scarfs and so many more things!


By the way that painting over there is also made by me with fingers on a recycled piece of wood!

If you want to see more of my art here is my portfoliolunaillustrations.blogspot.it

and my youtube channel: Art&Vlog


Hope you like this project! it’s an original idea I had because I thought it was a waste to just throw away those boxes, if you do please let me know in the comments if you’re gonna try it and what for!

Just a few ideas could be to organize: jewelery, toys, craft and art supplies, working tools, accessories, makeup and so on!

I’m actually gonna do another one, maybe smaller, for my hats, belts and scarfs.

Hope you all have a great awesome day!

A cute notebook for your house

Notebook from IKEA House Note.

This notebook is so nice! I love it! I use it for ink sketches and it holds the ink perfectly, the cover is so inspirational.

If you are an artist or if you just want to have a nice notebook around your home this is a really good one, and it’s thick as a book.

I forgot to take a picture from the side but, closed, the pages look yellow too. Really cute!

The ink sketches I’m making on this pad are on my portfolio if you want to see them ^^  lunaillustrations.blogspot.it

Here is how I take care of my mixed to (very) dry skin

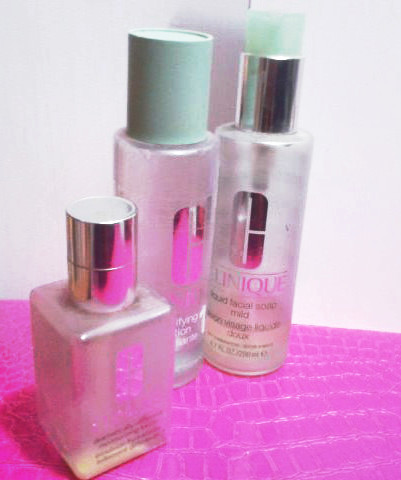
trio clinique

You know I’m addicted to Clinque!

I especially love their skin treatment products.

Clinique is a brand that doesn’t do animal testing (this is very important to me) on their website they say they do not test on animals any product or ingredient and they don’t ask others to test on their behalf unless is required by law : me = happy

So my skin is a mixed skin, it goes from normal to dry to extremely dry and I costantly look for good skin care products.

This trio by Clinique is complete and helps my skin quite a lot, my skin is smoother and softer and I love it!

  1. Cleanse

So the first step is the Liquid Facial Soap mild (I have this one in dry combination), it’s basically a soap to clean your face, and you can already feel the skin being very soft.

I tried the very dry to dry skin soap but weirdly enough it didn’t work as good as the dry combination even if at that time my skin was d-r-y. No idea why but the dry combination worked a lot better for me.

2. Exfoliate 

Second step is the Clarifying Lotion (I have it in very dry to dry skin), it’s like a toner (though it says it’s exfoliating), you apply it with a cotton ball and it’s another step to a smoother skin.

3. Moisturize

Lastly you want to apply the 3rd step which is the Moisturizng Lotion which is the cream. Very light one, no color, and I love it!

After those 3 steps OMG, you’ll love your skin!

only problem here is the price, it’s 20$ for each 200ml bottle! dang it! all together are 60$ and I can’t afford them that often at all.

However they are totally worth it! I’m so happy with my skin after I use this treatment that I even forget I have a problematic skin for days!

Love them but for me, right now, too pricey so… waiting for my next Christmas gift! LOL

Clinique high lengths Mascara – the best


★★★★★

I love clinique in general and this clinique high lengths mascara is SO good.

The brush is curved and the bristles are plastic and very very short. All this combined gives the best eyelashes ever.

It separates them and is a very deep dark color, it looks really great.

Because of the bristles you get no clumps, and no lashes stuck together.

Also it’s really good if you have sensitive eyes or if you use contact lenses.

Now about the price, I don’t know how much it is because I got it for Christmas, and I’m not sure that I want to know how much it is, i’m afraid it will be expensive.

However as I said I got it at christmas and I took this picture in april. As you can clearly see, after 4 months it’s still so wet and working so good and I’m using it a lot.

I love love love it.

||`•.¸¸.•´||ღ•.°•||`•.¸¸.•´||ღ•.°•||`•.¸¸.•´||ღ•.°•||`•.¸¸.•´||

Maybelline NY Dream Fresh BB Cream

★★

Thanks to I-don’t-know-what-you-are-thinking-about shop assistent I got this product 200 shades darker than my actual skin tone, (and I bought it in winter).

It’s Maybelline New York dream fresh BB cream 8 in 1. too much 8 in 1? yah let’s see: hydratation, covers imperfections, makes the skin softer, natural skin color, SPF 30 protection, oil free and something else.

Once again a product I can ONLY use during summer if i get a very very dark tan, which of course is not the product fault but the shop assistent who said this one was my color.

The only thing I can say that I’ve noticed about this product is that it’s VERY liquid, like a lot.

When I need the product I don’t turn upside down the bottle because it would pour it everywhere, instead I just shake it and get what I need from the top.

Anyway if I will buy it again I’ll be sure it will be 10 shades lighter, even though to be honest the only other shade I saw online looked extremly pale so I’m conflicted.

It was 10/12 euros (can’t remember) for 30 ml.


||`•.¸¸.•´||ღ•.°•||`•.¸¸.•´||ღ•.°•||`•.¸¸.•´||ღ•.°•||`•.¸¸.•´||

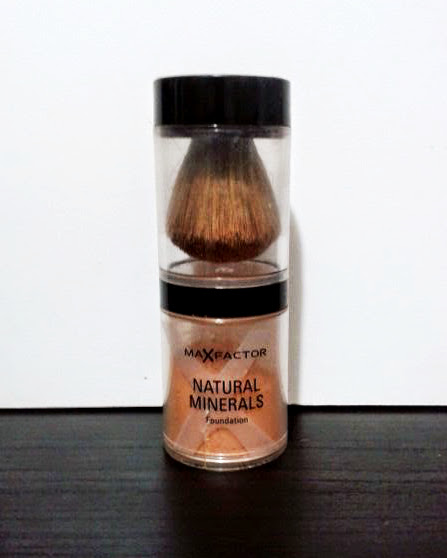
Max Factor Natural Minerals foundation

Max Factor Natural Minerals Foundation, let’s see.

I think this particular one is too dark for my skin so I only use it in the summer.

I think this is really good but the main reason why I don’t use it a lot is because it has some sparkly thing going on.

For going out at night I think it’s perfect, in the morning… not so much.

When you apply it on the skin you can actually see some shining particles, once again in my opinion, very nice for the night time, but not so nice for morning/ school time (at least for me!).

Here it comes the great news, I paied 5,90 euros for 10gr. (6$)

The shade I have is 60 Sand, but if I’m ever going to get this again I will get a lighter one for sure.

||`•.¸¸.•´||ღ•.°•||`•.¸¸.•´||ღ•.°•||`•.¸¸.•´||ღ•.°•||`•.¸¸.•´||

Clinique superdefense CC cream

I’m a clinique lover, especially for their treatment products, so I tried this CC cream superdefense colour correcting, skin protector from Clinique. 

This is both a makeup and a treatment product.

And well, I don’t have much to say about it. It does what it’s supposed to do and I’m not shocked like “wow that’s a life changing product”, I mean it’s alright, it does it job.

It sais it has UVA/UVB protection and hydratation, which is nice to know, and it does have an high coverage too.

Luckly my skin isn’t too damaged so I don’t wear it ALL over my face (I don’t wear any makeup foundation all over my face), only on redspots and undereyes circles, or wherever I need to.

It is 40 ml of product for 28,95 euros. (30$)

I really like it but the price is a little too high for me so I guess I won’t buy this again for the moment.

||`•.¸¸.•´||ღ•.°•||`•.¸¸.•´||ღ•.°•||`•.¸¸.•´||ღ•.°•||`•.¸¸.•´||

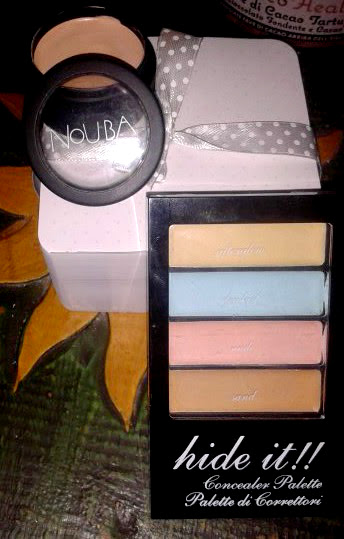
Nouba and Hide it! concealers … ew

These are two big disappointments.

Let’s talk about it.

First of all I’m an owl. I stay up till late and wake up early, I drink a lot of coffee and all that jazz of course it causes dark circles under my eyes.

So I try many concealers, and you may ask, why are these two concealers still looking new? Didn’t you try them?

Well I tried! The reason why they still look untouched is because it’s too hard to get the product out of them.

They are both too hard to get anything, summer and winter time. And even if you get some pigment you can’t really apply it or smooth it under your eyes.

The “hide it!!” concealer palette was 1,99 euros

The Nouba 1 touch is 5,5 ml for …wait for it…. 17 euros. As I said I try to cover the dark circles a lot, because they make the face look more tired and old etc. so I didn’t mind to spend that much for something good. And I thought if this little thing was so expensive it had to be good for sure.

Well it’s not. I don’t know if maybe I got a defective piece maybe? I don’t think so anyway, but seriously thumbs down for both of them.

The one star is for the cheap price of the palette only, but the Nouba one, the price is ridiculous!


If you have ever tried them please let me know what you think about them! I’m really curious

||`•.¸¸.•´||ღ•.°•||`•.¸¸.•´||ღ•.°•||`•.¸¸.•´||ღ•.°•||`•.¸¸.•´||

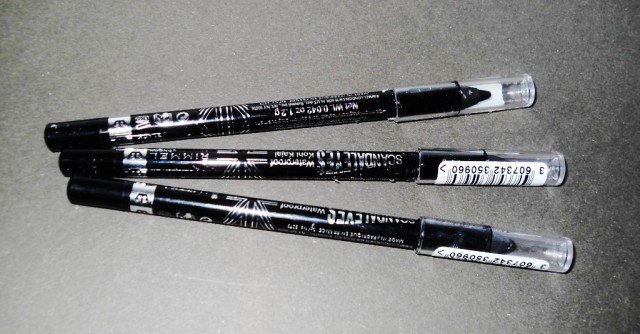
AMAZING Scandaleyes by Rimmel

★★★★★

So, when it comes to eye-pencils I’m extremily picky, first because my eyelids are very sensitive and I want a very soft pencil, second because I love the super dark black color.

I’ve tried so many pencils and most of them you have to stress the line so much, it’s painful, not good for your skin, and the result sucks.

But finally I found the perfect pencil that I will use for the rest of my life.

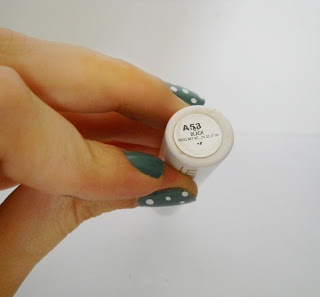
It’s the Rimmel Scandaleyes waterproof kohl kajal, and let me say it’s perfection.

It works as an eyeliner on your eyelid but I also use on the tear line of the eyes.

The best thing is that the consistence is so creamy and pigmented but the color doesn’t move at all, it doesn’t melt and you don’t find the color everywhere around your eyes even in the hot summer days! It doesn’t move unless you want to, you can wear it as an eyeliner or to make smokey eyes blending it.

It’s a-m-a-z-i-n-g!

Unfortunatly I could try only the color black because it costs 8 euros (8,50$) but honestly I wanna try them all because the color range is beautiful.

I would give this one 10 stars. If I could only use one makeup product for the rest of my life this pencil would be my choice!

The only down side of it though is that being so creamy it doesn’t last too long, I have constantly sharpen it so… I got three more!! LOL

||`•.¸¸.•´||ღ•.°•||`•.¸¸.•´||ღ•.°•||`•.¸¸.•´||ღ•.°•||`•.¸¸.•´||